Lost Ark New Player Guide: Conquer Arkesia on EU Central (2023)

Lost Ark New Player Guide: From Zero to Hero

So you’ve just started your adventure in the world of Lost Ark and you’re feeling overwhelmed? Don’t worry, we’ve all been there. This guide will provide a roadmap to help you navigate the early stages of the game and set you on the path to becoming a seasoned hero.

Choosing Your Region and Server

Before diving in, it’s crucial to select the right region and server. For the optimal experience with a large active player base, EU Central is highly recommended. US East and US West are also good choices.

While server choice is less critical for raiding (which is cross-server), opting for a high-population server like Kadan, Thirain, Zinnervale, Neria, Asta, or Trixion (EU Central) can be beneficial for guild activities and finding consistent party members.

Finding Your Class and Starting Your Journey

Lost Ark offers a diverse roster of classes, each with unique playstyles and strengths. Don’t feel pressured to follow the current "meta" – choose a class that resonates with you, as every class is capable of conquering the game’s most challenging content.

Resist the urge to use your Powerpass immediately. While tempting, delaying its use will allow you to learn the game’s mechanics organically. Progressing through the main story from levels 302 to 1302 at your own pace will familiarize you with your chosen class, keybinds, combat, and essential game systems like Stagger, Destruction, and Counter. You can always use the Powerpass on an alternate character later.

Embracing the Story and Honing Your Gear

As you embark on your journey with Armen, prioritize completing all available quests, especially those marked with a purple "!". These quests not only provide valuable rewards but also unlock additional content later on.

Honing is the process of upgrading your gear to higher item levels, and it’s essential for progressing through the game. You’ll be introduced to this system in Shushire after reaching item level 302. Utilize Chaos Dungeons and event Guardian Raids to acquire honing materials.

Here’s a quick rundown of the item level progression:

  • 460 ilvl: Required to reach Rohendel
  • 600 ilvl: Required to reach Yorn
  • 802 ilvl: Required to reach Feiton
  • 960 ilvl: Unlocks important content (details in-game)
  • 1100 ilvl: Required to reach Punika
  • 1340 ilvl: Required to reach South Vern
  • 1445 ilvl: Required to reach Rowen

Gathering Honing Materials

Upgrading your gear requires a steady supply of materials. Here are the primary ways to obtain them:

  • Daily Login Rewards and Events: Take advantage of these freebies!
  • Islands: Explore the numerous islands scattered across the world. The Lost Ark Maxroll Island Guide provides a comprehensive resource for maximizing your island rewards, including Island Tokens.
  • Chaos Dungeons and Guardian Raids: These are your primary sources of honing materials. Prioritize completing Chaos Dungeons daily and Guardian Raids every three days to benefit from double loot rewards.
  • Towers: Shadespire and Fatespire offer valuable materials and skill points.
  • Auction House: While generally not recommended for gear before reaching 1415 ilvl due to Pheon costs, the Auction House can be useful for other items like Accessories, Jewelry, Ability Stones, and some skins.

Side Content That Matters

While the allure of reaching the endgame is strong, don’t neglect these crucial side activities:

Mastering Gold and Silver

Lost Ark’s economy relies on both gold and silver. Here’s how to keep your coffers full:

  • Una’s Tasks: Completing 70 Una’s Tasks weekly grants Una’s Tokens, which can be exchanged for gold from the Gold Shop NPC (marked with a gold icon on the map).
  • Gathering Skills: Utilize your gathering skills (Mining, Fishing, Hunting, etc.) to collect resources that can be sold on the Auction House for a profit.
  • Legion Raids: Participating in Legion Raids (starting at 1415 ilvl with Valtan) rewards gold for defeating bosses.
  • Lopand Island: This island offers three quests that involve delivering supplies to major ports (Shushire, Arthetine, and Vern), rewarding a significant amount of silver. Utilizing Bifrosts (Alt + W) can greatly expedite these quests.

Navigating the Endgame

Once you reach the endgame, several new systems and activities become available:

Mastering Mechanics

Understanding and mastering key combat mechanics like Stagger, Destruction/Weak Point, and Counter is crucial for success in Legion Raids and other challenging content. The in-game Training Area (accessible through the Guide button in the bottom right corner of the screen) provides a safe environment to practice these mechanics. You can also find helpful video guides on YouTube, such as this one on Stagger, Weak Point, & Counter Mechanics.

Useful Keybinds

Familiarize yourself with these keybinds to navigate Lost Ark’s interface efficiently:

  • Alt + Q: World Content
  • Alt + D: Codex
  • Alt + C: Cards
  • Alt + W: Bifrosts
  • Alt + U: Guild
  • Alt + J: Una’s Tasks
  • Alt + E: Presets (for switching between builds)

Embrace the Journey

This guide provides a solid foundation for your Lost Ark adventure, but the best way to learn is to dive in and experience the game firsthand. Don’t be afraid to experiment, make mistakes, and learn from them. And remember, the most important tip is to have fun!

Genestealer Cults Tactics for Beginners: A 10th Edition Guide (With Army Overview)

The Four-Armed Embrace: A Casual Guide to the Genestealer Cults

Brothers, Sisters, Siblings, Ascension Day is upon us!

Tyranid hand bursting from the ground

It’s inspiring to see a tide of new players joining the ranks for 10th edition! The Genestealer Cults are a wonderfully quirky faction with some of the best lore and most unique playstyles in Warhammer 40,000. To help guide this influx of new Cultists, I’ve put together a beginner-friendly overview of our units, strategies, and what makes the army tick.

As a veteran Cultist since 8th edition, with over 80 games under my belt, I’m no tournament champion. However, my dedication to the Cult runs deep, and I’m eager to share my love for this amazing faction.

This guide is divided into four key sections:

  1. Collecting Your Cult
  2. Rules of the Uprising
  3. Dissecting the Masses: Unit Overview
  4. First Steps on the Path: Recommended Units

Let the uprising begin!

1. Collecting Your Cult

1. Embrace the Big Boxes: The Start Collecting and Combat Patrol boxes offer incredible value, providing a diverse range of awesome miniatures. Individual units can be pricey, so exploring second-hand markets is also a great way to expand your forces.

2. Kitbash and Proxy with Reckless Abandon: The very nature of the Genestealer Cults encourages creativity and customization. Leftover bits become sacred relics, transforming basic Neophytes into explosive-laden Saboteurs with a bit of ingenuity. Don’t be afraid to experiment! A generous application of grime and gore can work wonders to disguise any imperfections.

3. Unleash Your Cult’s Identity: The beauty of the GSC lore lies in its diversity. Each Cult boasts its own unique aesthetic, mutations, and beliefs. Let your imagination run wild and craft a narrative that reflects your vision.

4. Multiply Your Leaders (Except One): Rejoice! With the exception of the mighty Patriarch, you can now field up to three copies of each Character in your army. No need to worry about duplicate characters from multiple box sets!

2. Rules of the Uprising

10th edition has streamlined many of the complex (and let’s be honest, sometimes frustrating) rules that previously defined the GSC. This allows both new and veteran players to embrace a more relaxed and enjoyable playstyle, while opponents can revel in the challenge of facing down endless waves of devoted Cultists.

Here are the core rules to master:

1. Cult Ambush (Army Rule): Universally praised, Cult Ambush is the embodiment of the GSC’s resilience. When your basic units, like Neophytes, fall in battle, they have a high chance of returning to the fight after a single turn. It’s a thematic and satisfying rule that embodies the unrelenting nature of the Cult.

2. They Came From Below (Detachment Rule): Emerging from every nook and cranny, the GSC are masters of ambush. This rule grants a potent damage bonus and the ability to ignore cover when your reinforcements arrive from ambush, perfectly reflecting the chaos and confusion they sow.

3. Deep Strike (Hidden Army Rule): The majority of the GSC roster can execute devastating Deep Strikes, appearing from thin air to wreak havoc. This unparalleled maneuverability allows for cunning ambushes, surprise bomb detonations, and flanking maneuvers that will leave your opponents reeling.

3. Dissecting the Masses: Unit Overview

This section provides a concise overview of each unit’s role and relative ease of use.

Easy to Use units are forgiving and effective in most situations. Tricky to Use units require more finesse, planning, and often excel in niche scenarios.

Remember, unit viability fluctuates with each edition. This guide focuses on their core roles and strengths, which tend to remain consistent.

Aberrants: These hulking mutants are surprisingly durable and excel at tearing through enemy armor. (Easy to Use)

Abominant: A force multiplier for Aberrants, the Abominant boasts a high chance of resurrection, ensuring its impact is felt long after its initial demise. (Easy to Use)

Achilles Ridgerunner: This fast and resilient support vehicle weakens enemy units with potent debuffs. Its unique aesthetic is a fan favorite. (Easy to Use)

Acolyte Hybrids: While fragile, Acolytes pack a punch in close combat and excel at overwhelming weaker enemies at close range. Their versatility shines with access to heavy weapons, explosives, and specialized equipment. (Bread and Butter unit, but can be Tricky to Use)

Acolyte Iconward: While unremarkable alone, Iconwards provide crucial protection to nearby units. Their simple design lends itself well to kitbashing. (Easy to Use)

Atalan Jackals: Arguably the most mobile unit in the army, these bikers excel at flanking maneuvers, delivering explosive surprises, and swiftly securing objectives. (Can be Tricky to Use)

Biophagus: This potent support character enhances nearby units with a variety of chemical concoctions. Its model is a work of art. (Easy to Use, but requires memorizing various rules and profiles)

Clamavus: This propaganda-wielding DJ weakens enemy morale through sonic warfare. A niche unit with a unique flavor. (Very Hard to Use)

Goliath Rockgrinder: A brutal melee powerhouse, the Rockgrinder is a force of nature on the battlefield. Pair it with the "Tank Shock" stratagem for maximum carnage. (Easy to Use and incredibly satisfying)

Goliath Truck: This durable transport delivers your Cultists into the heart of battle and provides supporting fire once its passengers disembark. (Good and Easy to Use)

Hybrid Metamorphs: The Acolytes’ more aggressive cousins, Metamorphs trade weapon options for raw melee prowess. Their unique parts are perfect for kitbashing. (Tricky to Use)

Jackal Alphus: This leader enhances the Atalan Jackals’ mobility and packs a punch with a sniper rifle and trusty sidearm. (Can be Tricky to Use)

Kelermorph: A hit-and-run assassin, the Kelermorph excels at eliminating high-value targets before making a swift exit. (Tricky to Use)

Locus: A loyal bodyguard, the Locus enhances the survivability of nearby characters. Recent changes have made it a surprisingly fun and effective unit. (Easy to Use)

Magus: This psyker leader enhances the effectiveness of nearby core units and disrupts enemy shooting with psychic powers. Recent changes have significantly altered its role, making it difficult to assess. (Tricky to Use)

Neophyte Hybrids: The backbone of any GSC army, Neophytes are incredibly versatile and form the foundation of your shooting and objective-grabbing strategies. (Easy to Use and essential for any GSC player)

Nexos: This master strategist unlocks a wider range of stratagems, allowing for cunning plays and unexpected tactics. (Initially Tricky to Use, but becomes intuitive with practice)

Patriarch: The embodiment of the Cult’s aspirations, the Patriarch is a melee powerhouse capable of leading the charge and crushing any who stand in his way. (Easy to Use)

Primus: This frontline leader enhances nearby units and can strategically reposition your forces after deployment. A key unit in any GSC army. (Initially Tricky to Use, but becomes intuitive with practice)

Purestrain Genestealers: Agile, deadly, and surprisingly durable, Purestrain Genestealers are masters of ambush and close combat. Their ability to deploy anywhere on the battlefield makes them a constant threat. (Easy to Use)

Reductus Saboteur: This demolitions expert can unleash devastating attacks but often struggles to remain relevant after its initial explosive impact. (Somewhat Tricky to Use)

Sanctus: This stealthy sniper harasses enemy characters and picks off vulnerable targets from afar. (Tricky to Use)

4. First Steps on the Path: Recommended Units

When starting your GSC journey, the most important thing is to choose units that resonate with you. Experiment, have fun, and discover what playstyle suits you best.

However, if you’re looking to build a competitive foundation, certain units consistently prove their worth:

1. Neophyte Hybrids: These versatile troops are non-negotiable. They form the core of your army, providing reliable firepower and objective control.

2. Acolyte Hybrids: Their close-combat prowess and equipment options make them valuable assets in any GSC force.

3. Primus: This indispensable leader enhances nearby units and offers valuable strategic flexibility.

4. Goliath (Rockgrinder or Truck): Both variants of the Goliath provide significant battlefield presence. The Rockgrinder excels in melee combat, while the Truck offers reliable transport and supporting fire.

With this solid core, you’ll be well on your way to spreading the truth of the Four-Armed Emperor and claiming victory in His name.

Now go forth, spread the word, and may the Emperor’s will be done!

HMS Rodney Blitz Pass Review: Is This Tier VII Premium Battleship Worth It?

HMS Rodney Review: A Heavyweight Puncher

The HMS Rodney is a Tier VII Royal Navy premium battleship available in the Blitz Pass. This Nelson-class ship is a slow, fragile, yet hard-hitting battleship specializing in AP damage. While sharing similarities with her sister ship, HMS Nelson, the Rodney distinguishes herself through her AP focus and access to heavy repair teams.

Overview

Here’s a quick rundown of what to expect when commanding the HMS Rodney:

  • Difficulty: Easy
  • Effort Requirement: Low
  • Potential Damage Output: High
  • Potential Game Influence: Moderate

My Performance

Check out my stats so far!

I’m thoroughly enjoying this ship and plan to rack up many more battles.

Recommended Equipment

To maximize the Rodney’s performance, I suggest the following equipment setup:

  • Slot 1: Reload (-5%) – Improves the ship’s biggest weakness: its reload time.
  • Slot 2: Acceleration (+20%) – Helps offset the ship’s sluggishness and improve positioning.
  • Slot 3: Concealment (+10%) OR Rudder Shift (+15%) – Concealment is generally more beneficial for Rodney’s static playstyle. However, if you struggle with positioning and avoiding early fire, rudder shift can be a viable alternative.
  • Bonus: Advanced Gun Director – Extends the ship’s already impressive range, providing a slight indirect buff to dispersion.

Rodney vs. Nelson: A Tale of Two Sisters

While visually similar, the Rodney and Nelson have distinct strengths. Here’s a comparison to help you decide which ship best suits your playstyle:

Rodney’s Advantages:

  1. Superior Gun Range: Especially potent with the Advanced Gun Director bonus.
  2. Devastating AP Performance: Higher damage, penetration, and citadel potential compared to Nelson.
  3. Heavy Repair Teams: Allows for faster healing of a larger portion of HP, increasing survivability.
  4. Precise Aim I Consumable: Enhances accuracy, particularly useful for long-range engagements.
  5. Slightly Tighter Turning Circle: Offers a marginal advantage in maneuverability.
  6. Slightly Faster Acceleration: A minor edge in reaching crucial positions.

Nelson’s Advantages:

  1. Formidable HE Performance: Excels at setting fires and dealing consistent damage, particularly against destroyers.
  2. Faster Main Battery Reload: Allows for a higher damage output over time.
  3. Significantly Better Concealment: Provides an advantage in choosing engagements and dictating the terms of battle.
  4. Higher Silver Income: Beneficial for players looking to maximize their earnings.
  5. Slightly Higher HP Pool: Offers a marginal advantage in withstanding damage.

In a nutshell: Rodney reigns supreme in long-range engagements with her powerful AP salvos and enhanced survivability. Nelson, with her HE prowess and superior concealment, excels at mid-range encounters and destroyer hunting.

Firepower: Unleashing Devastating Salvos

The Rodney’s nine 406mm guns are a force to be reckoned with.

The Rodney’s firepower is where she truly shines. Her nine 406mm guns pack a serious punch, delivering some of the highest damage per salvo at Tier VII. Unlike her sister, the Rodney favors AP shells for maximum damage output.

Here’s what makes her guns truly fearsome:

  • High Damage per Shell: Each AP shell can cripple cruisers and significantly damage battleships.
  • Good Shell Dispersion: Unlike many battleships at this tier, the Rodney enjoys relatively tight groupings, increasing the chance of landing devastating hits.
  • High Citadel Chance: Combined with her accurate guns, the Rodney excels at crippling enemy ships with well-placed salvos.

While the Rodney boasts nine guns, many other 406mm battleships at Tier VII are limited to eight or suffer from poor dispersion.

Mastering Your Aim:

While the Rodney’s guns are powerful, they are not a replacement for good aim. Here’s a quick guide to maximizing your damage:

  • Battleships: Target turrets and deck for maximum damage. Avoid aiming at the belt, as the shells are unlikely to penetrate.
  • Cruisers: Aim for the belt (sides of the hull). Avoid the bow and stern to prevent overpens and reduced damage.

Destroying enemy modules, especially turrets, can significantly reduce the damage your ship takes in battle.

HE Shells: A Niche Role:

While the Rodney possesses decent HE shells, they are best reserved for engaging destroyers. Stick to AP for optimal performance against all other ship classes.

The Bow Tanking Advantage:

The Rodney’s all-forward turret layout offers a unique advantage: bow tanking. By angling your ship, you can maximize your firepower while minimizing your exposed profile. This tactic is particularly effective at longer ranges, allowing you to unleash devastating salvos while presenting a smaller target.

Protection: A Glass Cannon

The Rodney’s deck armor is particularly vulnerable, requiring careful positioning and angling to mitigate damage.

The Rodney’s Achilles’ heel is her fragile armor. Here’s a breakdown of her strengths and weaknesses:

Weaknesses:

  • Thin Deck Armor: Highly vulnerable to plunging fire from cruisers and battleships.
  • High Citadel Risk: Well-placed salvos can inflict devastating damage.
  • Low Damage Reduction: Typical of Royal Navy battleships, the Rodney suffers from reduced damage mitigation.

Strengths:

  • Strong Belt Armor: When angled correctly, the Rodney can withstand a surprising amount of fire.
  • Decent HP Pool: Provides a buffer against enemy fire.
  • Heavy Repair Teams: Significantly enhances survivability by allowing for rapid healing of a large portion of HP.

Maximizing Survivability:

  • Angling is Key: By angling your ship, you can bounce shells off your strong belt armor and minimize the exposed area of your vulnerable deck.
  • Utilize Bow Tanking: The Rodney’s turret layout allows for effective bow tanking, maximizing firepower while minimizing exposure.
  • Strategic Positioning: Avoid being caught in the open or engaging multiple enemies simultaneously.

Heavy Repair Teams: A Game Changer:

The Rodney’s heavy repair teams are a significant advantage, allowing her to recover from damage quickly and efficiently. This ability encourages a more aggressive playstyle, knowing that you can quickly replenish lost HP.

Note: At the time of this review, the heavy repair teams are bugged, causing the Rodney to take more fire and flood damage than intended. Wargaming has confirmed that this bug will be addressed in an upcoming patch.

Evasion: Maneuvering a Behemoth

With a top speed of 22-23 knots and sluggish acceleration, the Rodney is not known for her agility.

Key Points:

  • Rudder Shift is Your Friend: The Rodney’s fast rudder shift allows for quick turns, enabling you to dodge torpedoes and present a smaller profile to enemy fire.
  • Strategic Positioning is Crucial: Due to her low speed, the Rodney struggles to reposition quickly. Choose your engagements carefully and avoid being caught out of position.
  • Concealment Matters: While not her strong suit, utilizing concealment effectively can delay detection and allow you to dictate the terms of engagement.

Anti-Air: Woefully Inadequate

Don’t be fooled by the seemingly impressive AA suite; the Rodney is extremely vulnerable to air attacks.

The Rodney’s AA defenses are practically nonexistent, making her an easy target for aircraft carriers.

Key Points:

  • Pathetic Large Caliber AA DPS: The Rodney’s large caliber AA guns are woefully inadequate, leaving her vulnerable to long-range airstrikes.
  • Short-Range AA Offers Little Protection: While her short-range AA is decent, it’s only effective when planes are practically on top of you.
  • No Defensive AA Fire Consumable: Further exacerbates her vulnerability to air attacks.

Survival Tips:

  • Stick Close to Allies: Seek cover from friendly ships with stronger AA capabilities.
  • Hope for the Best: With limited defensive options, your best bet is to pray the enemy carrier focuses on other targets.

Final Verdict: A Brawler with a Punch

The HMS Rodney is a powerful yet fragile battleship that rewards players who can leverage her strengths while mitigating her weaknesses. Her devastating AP salvos, enhanced survivability through heavy repair teams, and unique bow tanking capabilities make her a formidable opponent in the right hands. However, her lackluster speed, fragile armor, and nonexistent AA defenses require careful positioning and strategic decision-making.

If you enjoy a straightforward, hard-hitting playstyle and can adapt to her limitations, the HMS Rodney is a rewarding addition to any fleet.

Albion Online Black Zone Ganking Guide: Survive and Thrive as a Solo or New Player

How to Avoid and Escape Gankers in Albion Online’s Black Zones: A Guide for Solo and New Players

[VapeJesus Guides 2023]

Hey everyone, VapeJesus here with another guide for solo and new players looking to brave the perils of Albion Online’s Black Zones. In this guide, we’ll focus on the art of avoiding and escaping gankers, ensuring you keep your hard-earned loot safe. We’ll cover essential gear choices, effective strategies, and provide insights to help you thrive in these high-risk, high-reward zones.

This guide is packed with information, so feel free to jump to the sections most relevant to you. Whether you’re a Fame Farmer or a gatherer, there’s something here to boost your survival rate.

Looking for more beginner tips? Check out my previous guides:

  • [5 Starting Weapon Choices for New/Solo Players (Good for PvP and PvE)](link to your guide)
  • [Gathering Basics: Leveling Tips and Getting Started](link to your guide)

Now, let’s dive into the world of Black Zone survival!

Understanding Your Adversary: Types of Gankers

Before we discuss escape tactics, it’s crucial to understand the different types of gankers you might encounter:

1. Solo Gankers: These lone wolves are common, especially in the Black Zone mists. They rely on catching you off guard, making them relatively easy to avoid with awareness and preparation. Recognizing their weapon and armor is key to countering their strategies, especially when using invisibility.

2. Small Group Gankers: Often found near Black Zone portal zones, these coordinated groups can pose a significant threat. Utilize Invisibility Shrines and be cautious when traveling to or from your Hideout. Remember, they might also target areas where invisibility effects end.

3. Massive Group Gankers: These organized, highly dangerous groups strategically position themselves to trap unsuspecting players. Unless you’re highly experienced and equipped for mobility, encountering them often means certain death.

Tips to Avoid Gankers: Outsmarting Your Pursuers

1. Master the Terrain: Familiarize yourself with the map layout. Use hills, narrow paths, and Avalonian Road portals to your advantage. If pursued, consider ducking into a mist and using the random portal for a quick escape.

Pro Tip: Dismounting near an open mist portal gives you a crucial time advantage, allowing you to enter before a pursuing ganker can react.

2. Predict Ganker Positioning: Anticipate potential ambush spots and adjust your route accordingly. Experience with small-scale PvP can provide valuable insights into common ganking strategies.

3. Monitor Hideout Activity: Check the local Hideouts for large alliances, especially those with numerous Hideouts in close proximity. These areas are often heavily patrolled, making them risky for solo players.

Surviving and Thriving: Essential Gear for Escape and Evasion

While skill and awareness are paramount, the right gear can significantly increase your survival chances. Here are some powerful options for mobility and invisibility:

Invisibility:

  • Invisibility Potions: A basic but essential tool, providing 7 seconds of invisibility. Be mindful of damage and debuffs that can break the effect.
  • Assassin Jacket: Grants invisibility within a 15-meter radius, unbroken by damage. Ideal for escaping solo gankers or buying time to utilize other escape tools.
  • Specter Shoes: Offers up to 16 seconds of invisibility, allowing you to cover vast distances. Manage your mana carefully when using this item.

Pro Tip: Chain Assassin Jacket and Specter Shoes for an extended invisibility combo, leaving your pursuers clueless about your whereabouts.

Movement:

  • Soldier Boots: A classic choice, providing increasing movement speed with Wanderlust. Combine with an Invisibility Potion for a potent escape.
  • Miner Boots: Grants a burst of 120% movement speed for 10 seconds, sacrificing the ability to use skills during and briefly after activation.
  • Weapons with Mobility: Consider weapons like the Bloodletter, Carving Sword, or Double Blade for their inherent movement abilities.

Other Useful Items:

  • Bedrock Mace: Excellent for both farming and escape. Use its leap and knockback abilities to create distance and disengage from fights.

Know Your Enemy’s Tools: Countering Ganker Abilities

1. Purges: Be aware of items like the Fiend Cowl that can dispel your invisibility and movement buffs. Timing your abilities strategically is crucial to avoid being caught defenseless.

2. Area of Effect (AoE) and Roots: Avoid getting hit by AoE damage over time effects and roots, especially when using Assassin Jacket’s limited invisibility range.

3. Invisibility: Remember, damage over time effects can break most invisibility effects. Stay vigilant and react accordingly.

Final Thoughts: Embrace the Challenge, Reap the Rewards

Surviving in Albion Online’s Black Zones is a rewarding challenge. Don’t be discouraged by early setbacks; each encounter provides valuable experience. Start with affordable gear, practice in less populated areas like the mists, and gradually increase your risk as you gain confidence.

Remember, knowledge is power. Equip yourself with the right information, gear, and mindset, and you’ll be well on your way to conquering the Black Zones and reaping the incredible rewards they offer.

Got any questions? Drop by my stream sometime, and let’s chat! https://www.twitch.tv/vapejesus

Generation Zero Machine Hunting Guide: Tips & Strategies For Every Level (Early Game to Endgame)

How to Dominate Every Machine in Generation Zero

New to the ravaged world of Generation Zero? Or maybe you’re a seasoned veteran looking for new tactics? This comprehensive guide will equip you with the knowledge to dismantle every machine threat, from the skittering Ticks to the fearsome Apocalypse Class.

We’ll cover optimal strategies, positioning, and weapon choices for every stage of the game:

  • Early Game: 1-3 Crown Weapons, Low Skill Points
  • Mid Game: 3-4 Crown Weapons, Medium Skill Points
  • Endgame: 5 Crown and Experimental Weapons, Max Level

Let’s dive in!

Small Machines: Quick and Deadly

Ticks: Small but Troublesome

Strategy: Ticks rarely change their tactics. You’ll encounter them in bunkers or deployed by Hunters.

  • Bunkers: Equip a shotgun with birdshot ammo (an SMG works too). Allow the Tick to spot you, wait for it to turn, then unleash a point-blank barrage.
  • Deployed: Your best bet is to create distance and let their battery deplete. If you must engage, a shotgun remains effective.
  • Ultimate Weapon: The Experimental 12 Gauge, with its devastating secondary explosion.

Apocalypse Variant: The same strategies apply, but exercise extreme caution to avoid their amplified attacks.

Seekers: Eliminate on Sight

Strategy: Seekers are best handled with swift and decisive action.

  • Any Range: Use any weapon at your disposal.

Canine Threats: Speed and Ferocity

Runners/Dogs: Agile and Aggressive

Early Game:

  • Priority: Evade their charge attack, which inflicts significant damage and stuns you. Listen for the audio cue, sidestep, and retaliate with focused fire on their fuel canisters.
  • Range: Target Prototype Dogs’ unarmored bodies with hunting rifles.

Mid Game:

  • Increased Durability: You can now withstand charges more effectively.
  • Close-Range Assault: Use ARs, SMGs, or shotguns to unleash a barrage of damage to their sides.

Endgame:

  • Overkill Efficiency: The Experimental PVG, while powerful, might be excessive.
  • Group Annihilation: The Experimental KVM with 2x red dot sights shreds through packs of Runners.
  • Close-Range Dominance: Execute a devastating maneuver with the Experimental Sledgehammer: sprint past the Runner on the left, swing, and aim for the fuel tank for an instant kill.

Apocalypse Variant: Maintain distance and stay mobile. Their radiation damage over time is not to be underestimated.

Hunter Class: Cunning and Deadly

Hunters: Masters of the Bow

Early Game:

  • Positioning: Keep a medium distance and be wary of their leaping lunge attack.
  • Weak Points: Aim for the fuel canister above the legs from behind, or the head from the front.
  • Weaponry: ARs and shotguns prove most effective.

Mid Game:

  • Long-Range Encounters: Sniper and Gas Mortar Hunters demand a different approach. Utilize hunting rifles and maintain perpendicular movement to avoid sniper fire. ADS only when firing.
  • Enhanced Vision: Equip IR vision modules on your binoculars for easier tracking. Tech View is a suitable alternative.

Endgame:

  • Mid-Range Powerhouse: The Experimental KVM or a Gold AI-76 reign supreme.
  • Long-Range Precision: The Experimental PVG delivers devastating accuracy.
  • Staggering Force: The Experimental 12 Gauge can momentarily disable Hunters.

Apocalypse Variant:

  • Extreme Caution: Apocalypse Hunters possess exceptional range and a deadly flamethrower.
  • Long-Range Tactics: Employ sniper rifles and be prepared to relocate frequently due to their increased resilience.

Harvester: The Gathering Force

Harvesters: Armored and Imposing

Early Game:

  • Exploit Weaknesses: Rockets and armor-piercing rounds are crucial. Attack from the rear and be mindful of their stomp attack.
  • Evasive Maneuvers: Strafe to avoid missile barrages.
  • Opportunity Strikes: When a Harvester deploys Hunters, use the distraction to deal damage, but be ready to engage the reinforcements.

Mid Game: Strategies remain largely unchanged from the early game.

Endgame:

  • Armor Piercing Powerhouse: The Gold AI-76 with AP rounds remains effective.
  • Hunter Elimination: Switch to the Experimental KVM with chain lightning to swiftly dispatch deployed Hunters.

Apocalypse Variant:

  • Predictable Patterns: Utilize cover; Apocalypse Harvesters repeatedly target the same location with their missiles.
  • Environmental Hazards: Be cautious of radioactive pools left behind by their missiles.
  • Hunter Threat: The primary danger lies in their Hunter escorts. Refer to the Hunter section for effective countermeasures.

Tank Class: The Iron Behemoth

Tanks: Slow but Devastating

Early Game:

  • Don’t Be Intimidated: Tanks may appear invincible, but their predictable behavior is their downfall.
  • Armor Penetration: Use AP rounds or rockets to breach their frontal armor from medium range.
  • Exploit Weaknesses: Switch to FMJ rounds on SMGs, ARs, and hunting rifles, or hollow-point rounds on pistols, targeting the exposed areas.
  • Constant Movement: Tanks alternate between machine gun and missile attacks. Sidestepping at long range, or sprinting sideways at close range, will render you nearly untouchable.

Mid Game:

  • Maintain Mobility: Sideways movement remains paramount.
  • Mortar Awareness: Tanks equipped with mortars require constant vigilance. Don’t get tunnel vision on their front; be aware of their surroundings.
  • Force Charges: You can trigger a charge by shooting off their weapons. Removing the machine gun is often preferable, as their missiles are easily avoided.
  • Grenade Barrage: While entertaining, grenades alone are unlikely to destroy a Tank.

Endgame:

  • Long-Range Dominance: Disable Tanks from afar with the Experimental PVG.
  • EMP Assault: Land a satisfying and effective EMP blast using the Experimental Sledgehammer.

Apocalypse Variant:

  • Avoid Cover: Contrary to conventional wisdom, steer clear of cover, especially forests. Their proximity mines are difficult to spot on uneven terrain.
  • Enhanced Weaponry: Their incendiary machine gun boasts increased bullet speed and fire rate. Sprint sideways when under fire, regardless of distance.
  • Shocking Solution: The Experimental Klauke with shock ammo is surprisingly effective. Spam their body until they fall.

Soviet Machines: Advanced and Ruthless

Lynx: The Swift Hunter

Mid Game:

  • Vulnerable Core: Assault rifles, with their rapid fire rate, are ideal for targeting the Lynx’s ball.
  • Explosive Force: Rockets aimed at groups of Lynx can prove devastating.

Endgame:

  • Instant Elimination: The Experimental PVG will obliterate a Lynx in a single shot.
  • Close-to-Medium Range Power: The Gold AI-76 or Experimental SMG excel at these distances.

Wolves: The Pack Hunters

Mid Game:

  • Opportunistic Strikes: Exploit battles between Wolves and Swedish machines in the Farmlands. Wait for both sides to weaken, then launch a surprise attack from the flank.
  • Target Prioritization: Focus fire on the rocket pods in tank form, or the head in walker form. The chaingun is too difficult to hit reliably.
  • Lynx Escorts: Be mindful of any accompanying Lynx.

Endgame: Strategies remain similar to the mid game.

Firebird: The Aerial Menace

Mid Game:

  • Long-Range Assault: Engage Firebirds from a distance, as they possess exceptional vision.
  • Cripple Mobility: Target the thrusters on their arms to hinder their movement.

Endgame:

  • Spetsnaz Threat: Spetsnaz Firebirds are among the most formidable foes. Their autocannon can shred through health and penetrate walls with splash damage.
  • Seek Strong Cover: Find sturdy cover, such as a building or truck, and stock up on advanced medkits.
  • Hacker Advantage: If you specialize in Hacking, successfully hacking a Firebird provides incredibly powerful aerial support. This is one of the few instances where Hacking truly shines.

Conclusion

Armed with this knowledge, you are well-prepared to face the mechanical terrors of Generation Zero. Remember to adapt your strategies, exploit weaknesses, and never underestimate the machines. Good hunting!

Dominate Destiny 2’s Crucible: A Beginner’s Guide to Void Titan (2023)

The Class You Love to Hate: Dominate the Crucible with Void Titan in 2023 (+ Video)

Guardians,

Let’s face it, you’ve seen them. Those impenetrable Void Titans locking down zones and effortlessly dismantling opponents in Trials of Osiris. Void Titan and its trusty companion, the Ward of Dawn (no, we don’t call it Bubble anymore), have firmly established themselves at the pinnacle of the current Crucible meta.

Ready to fight fire with fire? This beginner’s guide will equip you with the knowledge to unleash the might of Void Titan and understand why it’s the bane of every Guardian’s existence right now.

Want to see this build in action? Check out the accompanying video: https://youtu.be/LebPlFCo1oc

Prefer the written word? Read on, Guardian. We’ve got you covered.


Why Void Titan Reigns Supreme

Destiny 2’s PvP ecosystem has evolved. Control, Iron Banner, Trials – they all revolve around zone control. And what dominates zones better than an unkillable fortress of Void light?

You know what I’m talking about. Three Void Titans, standing strong within a shimmering Ward of Dawn, raining down suppression grenades and Witherhoard ticks. Good luck pushing through that.

"But Conditional Finality hard counters Bubble!" you might say. Does it, though? Is a single Super truly an "easy counter" when facing a coordinated team empowered by overshields, weapon buffs, and the ability to chain Supers?

Let’s talk about those overshields. 45 HP may not seem like much, but it’s a game-changer. That seemingly small shield increases your Time-to-Kill (TTK) against popular weapons like 120 Hand Cannons and Aggressive SMGs by a staggering 22-50%. Suddenly, you’re winning every gunfight.

And it gets better. Bastion barricades share the overshield love with nearby allies. That’s right, your entire team becomes significantly harder to kill. It’s essentially a team-wide damage resistance buff.

But wait, there’s more! Void Titans have access to some of the most potent PvP Exotics in the game, further amplifying their strengths.

The result? A dominant force in the Crucible. Prepare to witness (and master) the most frustratingly effective class in Destiny 2 PvP.


Gearing Up for Domination: Exotic Armor

Titans are blessed with a plethora of powerful Exotics. Here, we’ll focus on the ones that synergize best with Void Titan, pushing it from "strong" to "downright unfair."

Peacekeepers: The SMG Powerhouse

Peacekeepers are your go-to for SMG supremacy. These gauntlets grant the same sprint and slide bonuses as Dunemarchers, but with the added benefits of:

  • +50 Mobility
  • Increased strafe speed
  • Max handling
  • Faster SMG swap and ADS speeds
  • Auto-reloading stowed SMGs

This pairs perfectly with the current SMG meta. Unending Tempest, The Immortal, Cloudstrike – these weapons are already dominant, and Peacekeepers make them even more lethal.

Crest of Alpha Lupi: The Instant-Heal Surprise

While Dunemarchers are a solid neutral-game choice, Crest of Alpha Lupi offers a surprisingly powerful alternative. This chest piece turns your barricade into a healing beacon, instantly restoring a massive chunk of health to you and nearby allies within 12 meters.

Combine this with Bastion’s overshield, and you have a recipe for near-constant regeneration. Take damage, pop a barricade, instantly heal and gain an overshield. Rinse and repeat. It’s disgustingly effective.

Oh, and did I mention it grants an additional Super orb per Ward of Dawn? Prepare for a relentless barrage of Supers.


Aspects and Fragments: Fine-Tuning Your Void Arsenal

Aspects: Embracing the Overshield

  • Bastion: This is non-negotiable. Bastion grants overshields to you and nearby allies when casting your barricade. The barricade itself becomes a regenerating overshield dispenser, extending the duration of your newfound durability. Did I mention it also grants overshields to allies when you cast Ward of Dawn? Yeah, it’s that good.
  • Offensive Bulwark: Overshields are the name of the game, and this Aspect makes them even better. While shielded (from any source), you gain increased grenade recharge rate, extended melee range and damage, and melee final blows extend your overshield duration.

Fragments: Enhancing Your Strengths

  • Echo of Vigilance: Score a kill while critically wounded? Enjoy a temporary Void overshield. This Fragment is essentially a mini One-Eyed Mask, rewarding aggressive play and synergizing perfectly with Offensive Bulwark.
  • Echo of Leeching: +10 Resilience and health regeneration for you and nearby allies on melee kills? Yes, please. This Fragment is a must-have for its sheer utility.
  • Echo of Undermining: Weaken enemies with your Void grenades, setting them up for easy Scatter Grenade kills. Control the battlefield and punish those who dare challenge your dominance.
  • Echo of Dilation: Enhanced crouch radar, faster crouch walking, and +10 Mobility and Intellect. This Fragment offers incredible value, improving your awareness and maneuverability.

This is just a taste of what Void Titan can achieve. Master these fundamentals, experiment with different loadouts, and prepare to become the unkillable force you were always meant to be.

See you in the Crucible, Guardian.

MrArmageddon

EU4 Scotland Guide: Form a Pirate Republic & Dominate the Seas

Hoist the Black Flag: A Guide to Pirate Republic Britain in EU4

Ahoy, fellow EU4 captains! Looking for a swashbuckling change of pace? Look no further than a Pirate Republic Britain run. This guide will chart a course to transform Scotland into a terrifying thalassocracy, striking fear into the hearts of England and beyond.

Setting Sail: Early Game as Scotland

  1. Initialization: Choose Scotland as your starting nation.
  2. Early Diplomacy:
    • Rival England and send a scornful insult their way.
    • Improve relations with England’s rivals, particularly Burgundy. Castile and Aragon can also be valuable allies.
    • Maintain cordial relations with France, but avoid an alliance.
  3. Estate Management:
    • Remember, Pirate Republics don’t have estates. Any privileges you enact will be temporary.
    • Prioritize the following estate actions:
      • Grant all monopolies.
      • Sell titles for a quick influx of gold.
      • Enact "Patronage of the Arts." (Wait until you’ve taken actions that lower your prestige to maximize its effect).
      • Choose "Private Trade Fleet," "Indebted by the Burghers," "Burghers Forced Draft," and "Primacy of the Nobility."
      • Fabricate a claim on Northumberland.

Transforming into a Pirate Republic

  1. Building Your Privateering Fleet:
    • Construct trade ships in every province in Scotland and the Isles.
    • Build two additional trade ships in your four southernmost provinces.
  2. Preparing for Transformation:
    • Enact the "Draft Ships for War" decision.
    • Focus on military technology.
    • Drill your armies and use your trade ships to privateer in the North Sea.
  3. The Path to Piracy:
    • Once your privateers control 10% or more trade power in the North Sea, release the Isles. Denmark will likely conquer them, but don’t worry – they’ll be the target of your first conquest.
    • Sell Sutherland and Inverness to the highest bidder.
    • Sell Perth or return it to Gaeldom (do not release a vassal).
    • Accumulate two points of stability. Utilizing the parliament debate to gain stability can be beneficial.
  4. Embracing the Black Flag:
    • With the requirements met, take the decision "Hoist the Black Flag."
    • Add the piracy map mode to your shortcuts and begin raiding all nations except France and Burgundy. Maintaining positive relations with these continental powers is crucial to avoid an early coalition.

First English War: Claiming Your Birthright

  1. Assessing the Situation: By this point, England will likely be embroiled in the Hundred Years’ War and potentially the War of the Roses.
  2. Striking at the Right Moment: Declare war when England is vulnerable, such as when their armies are weakened from fighting France or rebels. Ideally, time your declaration for when England is retaking Northumberland from rebels, allowing you to besiege the province with a defender advantage.
  3. Securing Victory:
    • Declare war using your claim on Northumberland, not your core on Mann.
    • Use your raiding income to hire at least two mercenary companies.
    • Call all allies into the war.
    • Don’t be deterred if England has mainland allies; they are unlikely to send troops.
    • Enact the "Wooden Wall" naval policy and actively manage your navy to control the seas.
    • Occupy all of England’s territories in Britain.
  4. Dictating Peace: Wait until the Hundred Years’ War concludes or you achieve 100% warscore. England’s allies will likely peace out independently, or England will be forced to accept your terms.

Conquering Ireland: Expanding Your Domain

  1. Uniting the Emerald Isle: Declare war on one of the Irish minors and co-belligerent all others (excluding non-Irish allies).
  2. Swift and Decisive Action: Occupy all Irish provinces and capitals before making peace. If England attacks one of your occupied minors, allow them to occupy the province. Once you’ve secured the rest of Ireland, vassalize the English-occupied minor, triggering a second English war.
  3. Consolidating Gains:
    • Aim for maximum war score in each peace deal.
    • Try to prevent France and Burgundy from joining a coalition. If a coalition forms, don’t panic! Your "Wooden Wall" will deter invasions. Use the opportunity to demand substantial sums of money and war reparations from blockaded nations like France.
  4. Embracing Isolation: Enact the second government reform, preventing alliances with non-Pirate Republics. This powerful reform streamlines your diplomatic options and allows you to focus on your rivals’ destruction. You can still ally and vassalize fellow pirates like Rugen and Gotland.

Danish War: Securing the North Sea

  1. Naval Superiority: Focus your shipbuilding efforts on producing galleys.
  2. Capitalizing on Distractions: Declare war on Denmark while they are occupied with another conflict.
  3. Controlling the Straits: Blockade the Danish straits and occupy as many islands as possible.
  4. Peace Terms: Prioritize reclaiming the Isles if Denmark captured them. Seize Bornholm to facilitate raiding in the Baltic Sea and at least one Icelandic province to establish a foothold for colonization.

Charting Your Course: Ideas and Long-Term Strategy

  1. Exploration Ideas: Start with exploration ideas. Colonizing the New World provides a safe outlet for expansion and a source of income.
  2. Managing Coalitions: Ignore colonial coalitions as long as you can defeat the native allies. Ideally, provoke France into declaring war, allowing you to blockade their ports while you defeat their native allies. Use this opportunity to demand further concessions from France in the peace deal.
  3. Further Expansion:
    • Fight wars over colonies and aim to capture an island in the Mediterranean to open a new raiding front.
  4. Forming New Nations:
    • State Ireland first and begin culturally shifting to Irish. There’s no need to unstate provinces; simply invest in development.
    • Once you’ve completed your desired Scottish missions, form Ireland.
    • After completing the Irish missions, state the English provinces and form England.

Tips for a Successful Campaign

  • Consider pursuing naval and maritime ideas for a dominant naval force.
  • Aim to achieve naval hegemony for even stronger naval bonuses.
  • Embrace the "War of the World" and abolish slavery for a challenging achievement.
  • Don’t settle for five provinces in the Caribbean. The island monument that grants +50% privateer efficiency is more valuable than an additional colony.

With this guide, you’re ready to embark on your journey to transform Britain into a feared pirate kingdom. Set sail, captain, and may your coffers overflow with plundered gold!

Heian City Story Beginner’s Guide: Build a Thriving City & Conquer Ancient Japan

Heian City Story: A Beginner’s Guide to Thriving in Ancient Japan

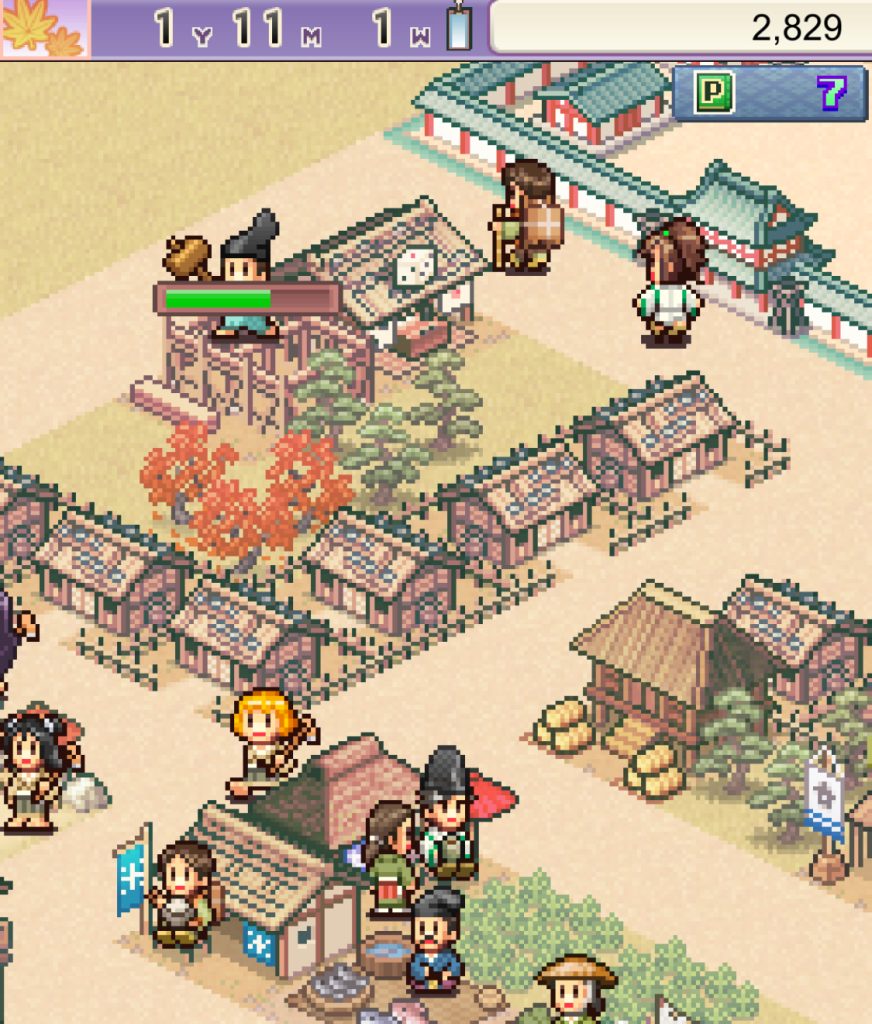
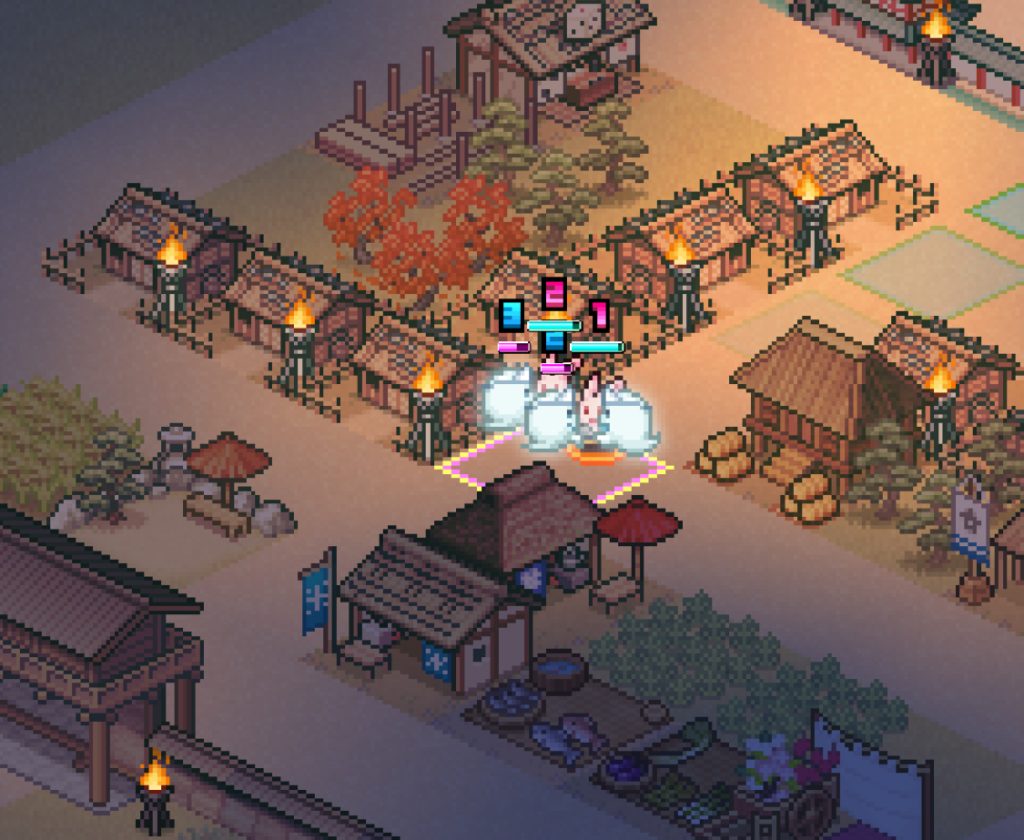
Navigating the complexities of Heian-era Japan in Heian City Story can be daunting for a newcomer. This guide will illuminate the game’s mechanics, offer proven strategies, and equip you to build a prosperous city while defending it from supernatural threats.

Laying the Foundations for a Flourishing City


Heian City Story masterfully blends city building with engaging mini-games like tower defense. Here’s how to get started:

  • Maximize Your Income: Don’t underestimate the value of prime real estate! Construct residential areas on expensive land to maximize tax revenue. Remember, you can always relocate houses later as your city prospers.
  • Unlock New Possibilities: The key to progress lies in expansion. Build new facilities as soon as you can to unlock a wider array of jobs, streets, and opportunities for your city to flourish.
  • Stay Up-to-Date: Ensure you’re playing the smoothest version of the game. Version 1.0.3 squashed a pesky bug that caused freezing during the “Koume Utaawase” song competition. Download the update here.

Secret Character Unveiled: Whispers travel through the bamboo groves of a mysterious visitor from afar. Rumor has it that a traveler from Cairo Park might grace your city with his presence! Official Website To unlock this enigmatic figure, rise to the challenge of the “Rescue Cairo-kun Lv. 40” request. Achieve a perfect 5-star rating and reach a score of 500 in Food, Living, Entertainment, and Culture in the city evaluation. Your efforts will be rewarded with Cairo’s unique house, which generates a staggering 500% tax revenue based on land value! Source: Bulletin Board

Mastering the Art of Spiritual Defense

Protecting your city from Yokai and unruly animals is paramount to your success.

  • Understanding Enemy Behavior: Enemies emerge from fixed locations and will relentlessly target your houses and watchtowers. Your only safe haven is the 3×3 area surrounding the Dosojin, the traveler’s guardian statue.
  • Strategic Placement is Key: Construct commercial districts near enemy spawn points to act as buffers, protecting your residential areas and buying precious time to replenish your Onmyoji’s (spiritual mage) power. While destroyed houses can be repaired, the disruption to work and daily life can set you back.
  • Land Expansion Battles: Time is of the essence when expanding your territory. Engage animal enemies swiftly, as a time limit adds an extra layer of challenge.

Advanced Combat Tactics:

  • Mid to Late Game Strategy: As your city grows, so too will the strength of your enemies. Utilize Onmyoji who wield rebound curses to counter enemies shielded by barriers or those who attack from a distance.
  • Conquering Boss Battles: When facing formidable boss enemies, summon a Shikigami (summoned creature) with high HP to absorb the brunt of the boss’s attacks. Meanwhile, your other Shikigami and strategically placed facilities can focus on whittling down the boss’s health. Remember, you can resummon your Shikigami as needed.
  • Beware During Expansion: Be vigilant during land expansion battles. The area where animals spawn can dynamically shift and expand. Plan your Shikigami placement accordingly to avoid being caught off guard.
  • The Cairo Advantage: Unlocking Cairo Bodhisattva provides more than just a tax bonus. Like your trusty watchtowers, Cairo can unleash attacks on encroaching enemies, bolstering your defenses.
Analytics